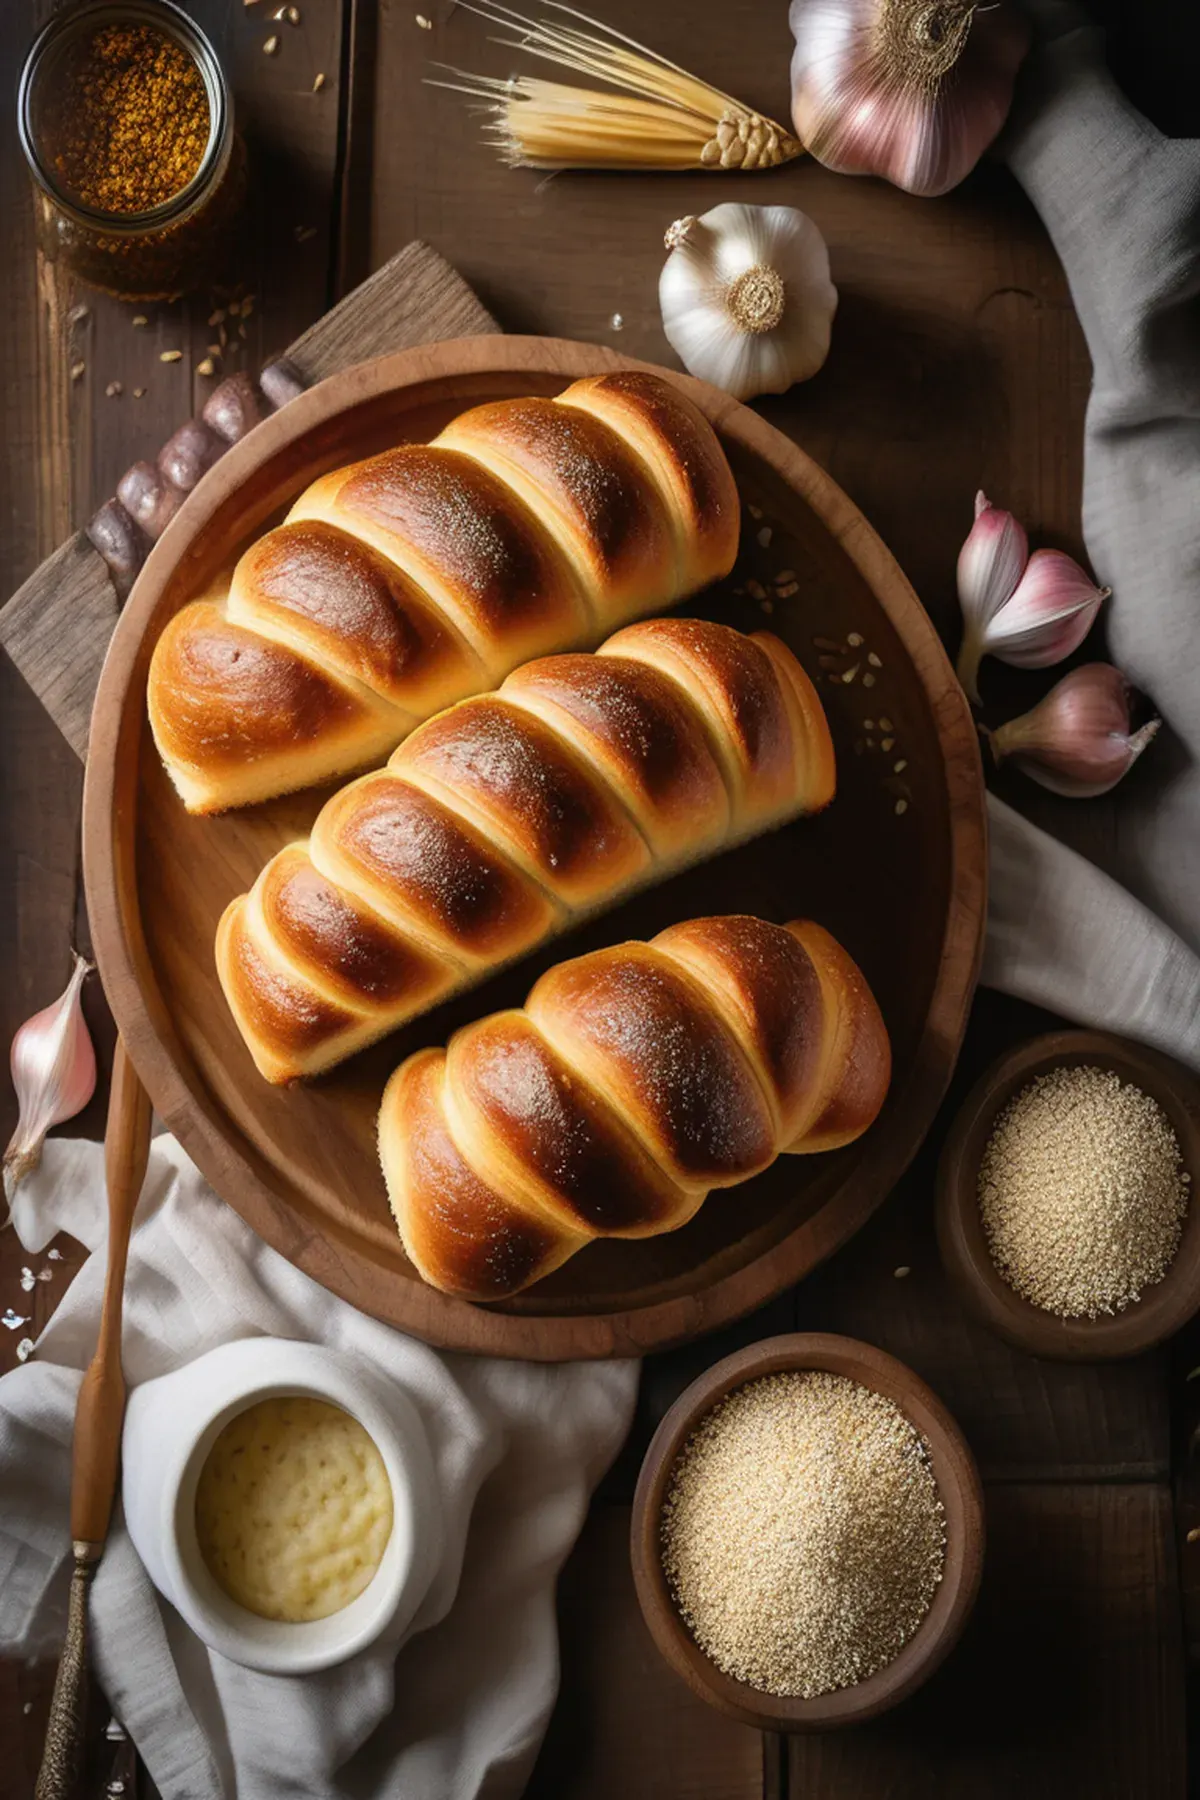
Garlic Brioche
Prep
30 mins
Cook
25 mins
Servings
8
Difficulty
Medium
You're going to love this recipe because it combines the richness of classic brioche with savory garlic and fresh thyme, and honestly, it's so quick to make. The whole thing takes just under an hour from start to finish, which makes it perfect for a weeknight dinner or weekend brunch. I've loaded it with fresh garlic, which is wonderful for heart health and circulation, and the beauty of this bread is that it uses simple pantry staples you probably already have at home. There's something magical about biting into that buttery, pillowy crumb with bursts of aromatic garlic throughout. Trust me, once you master this one, you'll be making it constantly.
Ella x
Ingredients
- 500 gall-purpose flour
- 150 mlwhole milk(warmed)
- 100 gbutter(softened)
- 3eggs(room temperature)
- 7 ginstant yeast
- 8garlic cloves(roasted and minced)
- 10 gsea salt
- 25 gwhite sugar
- 10 gfresh thyme(chopped)
- 15 mlolive oil(for brushing)
Detail level
Instructions
- 1
Roast garlic cloves in a small oven-safe dish at 190°C for 15 minutes until golden and soft. Squeeze the cloves from their skins and mince finely.
Tip: Roasting garlic beforehand mellows its sharpness and adds a sweet, nutty depth to the brioche.
- 2
In a large mixing bowl, combine warmed milk, yeast, and a pinch of sugar. Let sit for 5 minutes until foamy.
Tip: This bloom activates the yeast and ensures proper rise.
- 3
Add flour, eggs, remaining sugar, and salt to the yeast mixture. Knead for 8 minutes until a shaggy dough forms.
Tip: Use an electric mixer with a dough hook if available to save time and effort.
- 4
Gradually incorporate softened butter into the dough, kneading for another 5 minutes until fully incorporated and smooth.
Tip: Add butter in small pieces to prevent it from breaking the gluten structure.
- 5
Fold in roasted garlic and fresh thyme until evenly distributed throughout the dough.
Tip: Reserve a small amount of thyme for the tops of the rolls if desired.
- 6
Place dough in an oiled bowl, cover with a damp cloth, and let rise at room temperature for 90 minutes until doubled in size.
Tip: A warm spot in your kitchen, like near a sunny window, will speed up the rising process.
- 7
Divide the dough into 8 equal portions and shape each into a smooth ball. Place on a lined baking tray, spacing them 5 cm apart.
Tip: Smooth, tight shaping helps create even, attractive rolls.
- 8
Cover the shaped rolls and let rise for 45 minutes until puffy and light.
Tip: The rolls should increase in size but not completely double for the best texture.
- 9
Brush each roll with olive oil and sprinkle with reserved thyme. Bake at 200°C for 20-25 minutes until golden brown on top.
Tip: The brioche is done when it sounds hollow when tapped underneath.
- 10
Remove from oven and cool on a wire rack for 10 minutes before serving warm with butter.
Recipe Variations
Get AI-powered ingredient substitution suggestions.
You Might Also Like

Beergarita
My go to drink for summer gatherings is this refreshing Beergarita, and let me tell you, it's a total crowd pleaser. The combination of tequila, triple sec, fresh lime juice, and a cold Corona creates something that tastes way more complicated than it actually is. Lime juice is packed with vitamin C, which is great for your immune system, and the whole thing takes just five minutes to throw together. Best part? It's incredibly budget friendly since you're probably already stocking most of these ingredients anyway.
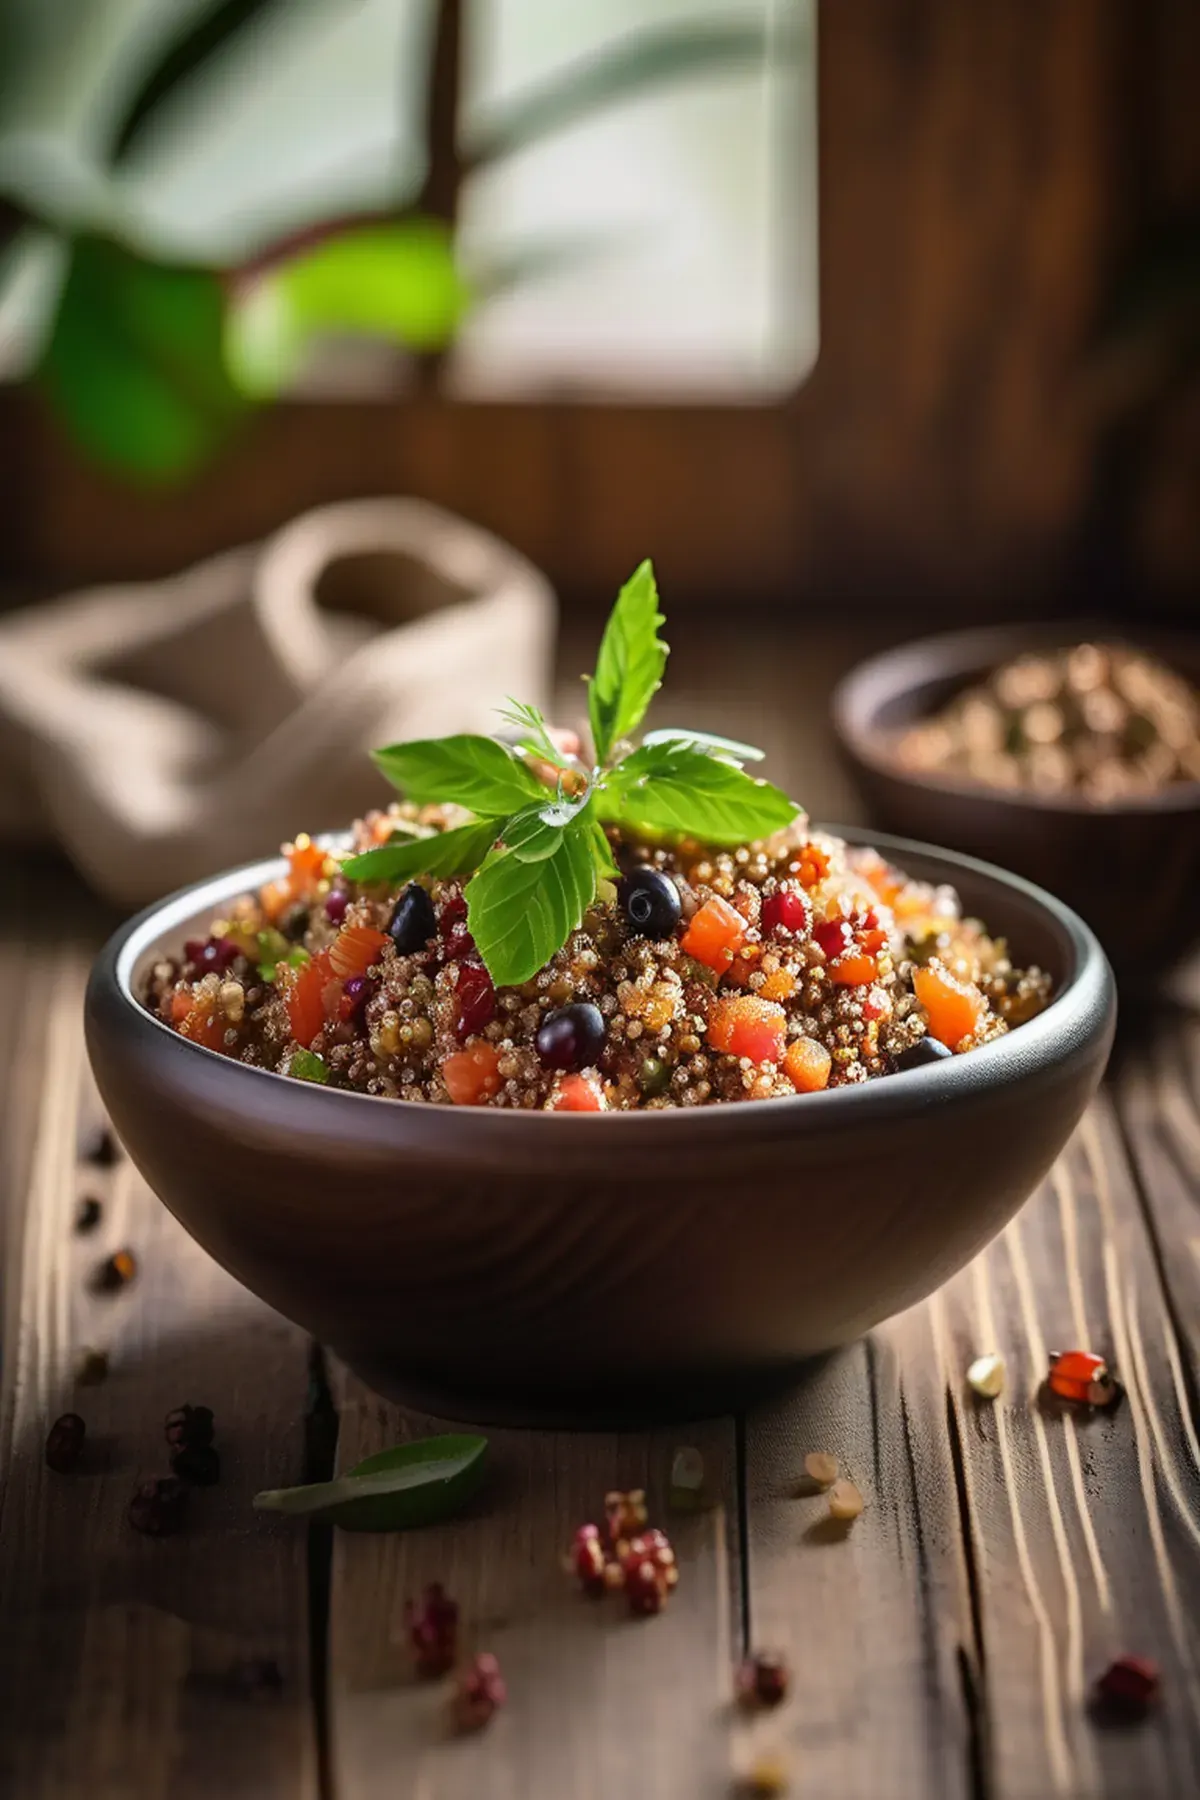
Tropical Quinoa
This tropical quinoa bowl has become my go to weeknight dinner because it comes together in just forty minutes and tastes like a mini vacation on a plate. Quinoa is one of my favorite ingredients since it's a complete protein with all nine essential amino acids, making it so satisfying and perfect for keeping energy levels steady. The combination of papaya, red bell pepper, and fresh cilantro brings vibrant flavors and colors, while the rice wine vinegar and orange zest add just the right brightness. Best part is the ingredient list is simple and affordable, yet feels fancy enough to impress anyone at your table.

Yuzu Collins
Have you tried a Yuzu Collins? This is my go to drink when I want something refreshing that comes together in just five minutes. The yuzu juice adds this beautiful citrus brightness that feels fancy but honestly couldn't be easier to make. I love that yuzu is packed with vitamin C, so you're basically getting a little immune boost while you enjoy your cocktail. It's the kind of drink that impresses friends without requiring any special bartending skills, perfect for a casual evening at home.
Reviews
Sign in to write a review.