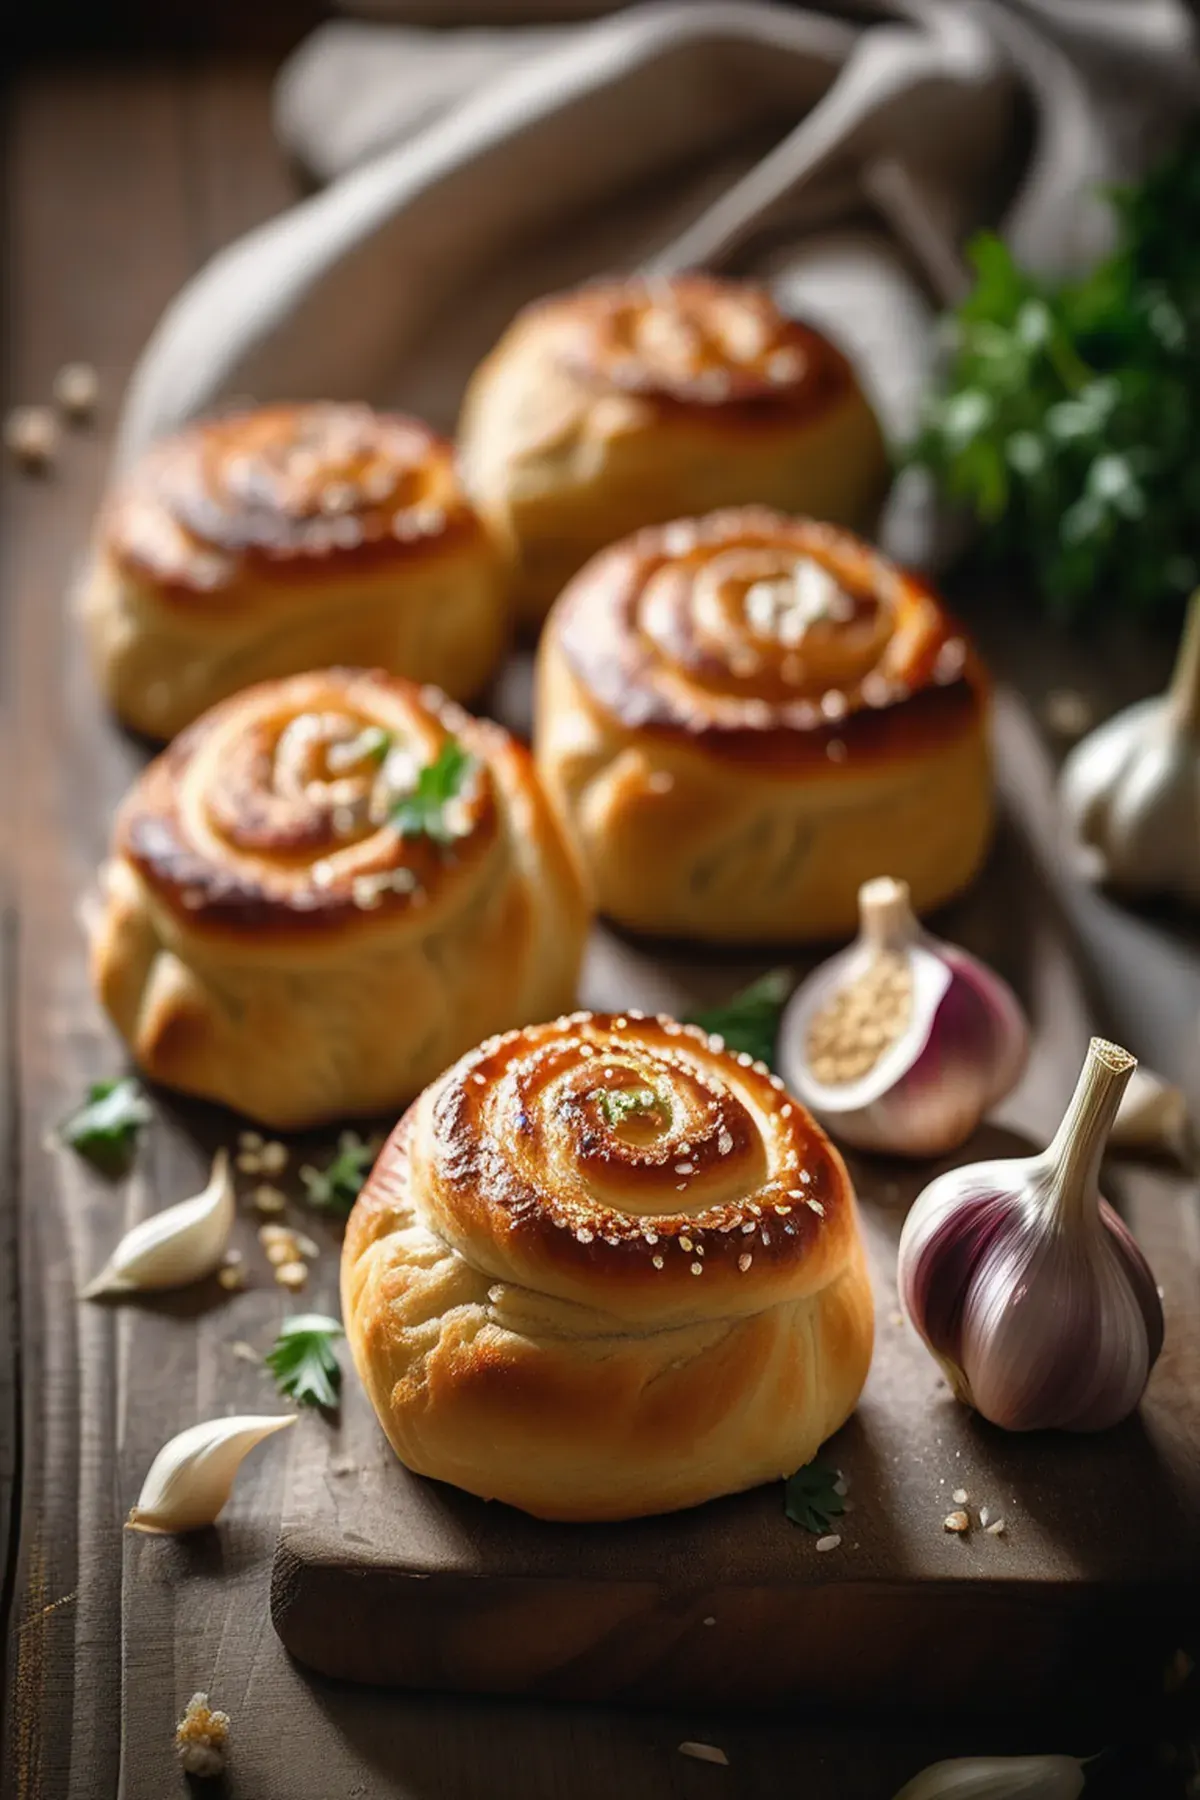
Garlic Rolls
Prep
20 mins
Cook
25 mins
Servings
8
Difficulty
Medium
These garlic rolls are my go to when I want something impressive without spending hours in the kitchen. With just 45 minutes total from start to finish, they're surprisingly simple to make and incredibly budget friendly. The best part? Fresh garlic isn't just delicious, it's packed with immune boosting compounds that make these rolls feel a bit good for you. I love pulling a warm batch from the oven and brushing them with garlic butter and fresh herbs. Your kitchen will smell absolutely amazing, and your friends will think you've been baking all day. Trust me, this recipe is a total game changer for weeknight dinners or casual entertaining.
Ella x
Ingredients
- 500 gall-purpose flour
- 300 mlwarm water
- 7 ginstant yeast
- 8 gsalt
- 10 gsugar
- 40 mlolive oil
- 8garlic cloves(minced)
- 60 gbutter(softened)
- 15 gfresh parsley(chopped)
- 5 gfresh thyme
- 3 gsea salt(for topping)
Detail level
Instructions
- 1
Combine warm water, instant yeast, and sugar in a large bowl. Let sit for 5 minutes until foamy, indicating the yeast is active.
Tip: This blooming step ensures your yeast is alive and will help your rolls rise properly.
- 2
Add flour and salt to the yeast mixture, then pour in 30 ml of olive oil. Mix until a shaggy dough forms, then knead for 8 minutes until smooth and elastic.
Tip: If the dough is too sticky, add flour 1 tablespoon at a time. It should be soft but manageable.
- 3
Heat the remaining 10 ml of olive oil in a small pan over medium heat. Add minced garlic and sauté for 2 minutes until fragrant but not browned. Fold the garlic mixture into the dough gently.
Tip: Don't overcook the garlic or it will become bitter. Just warm it through to release the flavors.
- 4
Place dough in an oiled bowl, cover with a damp cloth, and let rise in a warm place for 1 hour until doubled in size.
Tip: A warm oven with the light on, or a sunny windowsill, works great for rising.
- 5
Divide the dough into 8 equal portions and shape each into a tight ball. Place rolls on a lined baking tray, leaving space between them.
Tip: Roll each piece between your palms to create tension on the surface for a nice round shape.
- 6
Cover the rolls with a damp cloth and let them rise again for 30 minutes until puffy and touching slightly.
Tip: The rolls should spring back slowly when poked—this indicates proper proofing.
- 7
Preheat oven to 200°C. While it heats, prepare the garlic butter by mixing softened butter with 2 minced garlic cloves, fresh parsley, and thyme.
Tip: Make the garlic butter fresh just before baking so the flavors are vibrant.
- 8
Bake rolls at 200°C for 22-25 minutes until golden brown on top. Remove from oven and immediately brush each roll generously with the garlic herb butter.
Tip: Brushing immediately after baking helps the butter soak into the warm rolls for maximum flavor.
- 9
Sprinkle with sea salt flakes and additional fresh parsley if desired. Serve warm.
Tip: These rolls are best enjoyed fresh from the oven but can be reheated gently the next day.
Recipe Variations
Get AI-powered ingredient substitution suggestions.
You Might Also Like

Beergarita
My go to drink for summer gatherings is this refreshing Beergarita, and let me tell you, it's a total crowd pleaser. The combination of tequila, triple sec, fresh lime juice, and a cold Corona creates something that tastes way more complicated than it actually is. Lime juice is packed with vitamin C, which is great for your immune system, and the whole thing takes just five minutes to throw together. Best part? It's incredibly budget friendly since you're probably already stocking most of these ingredients anyway.
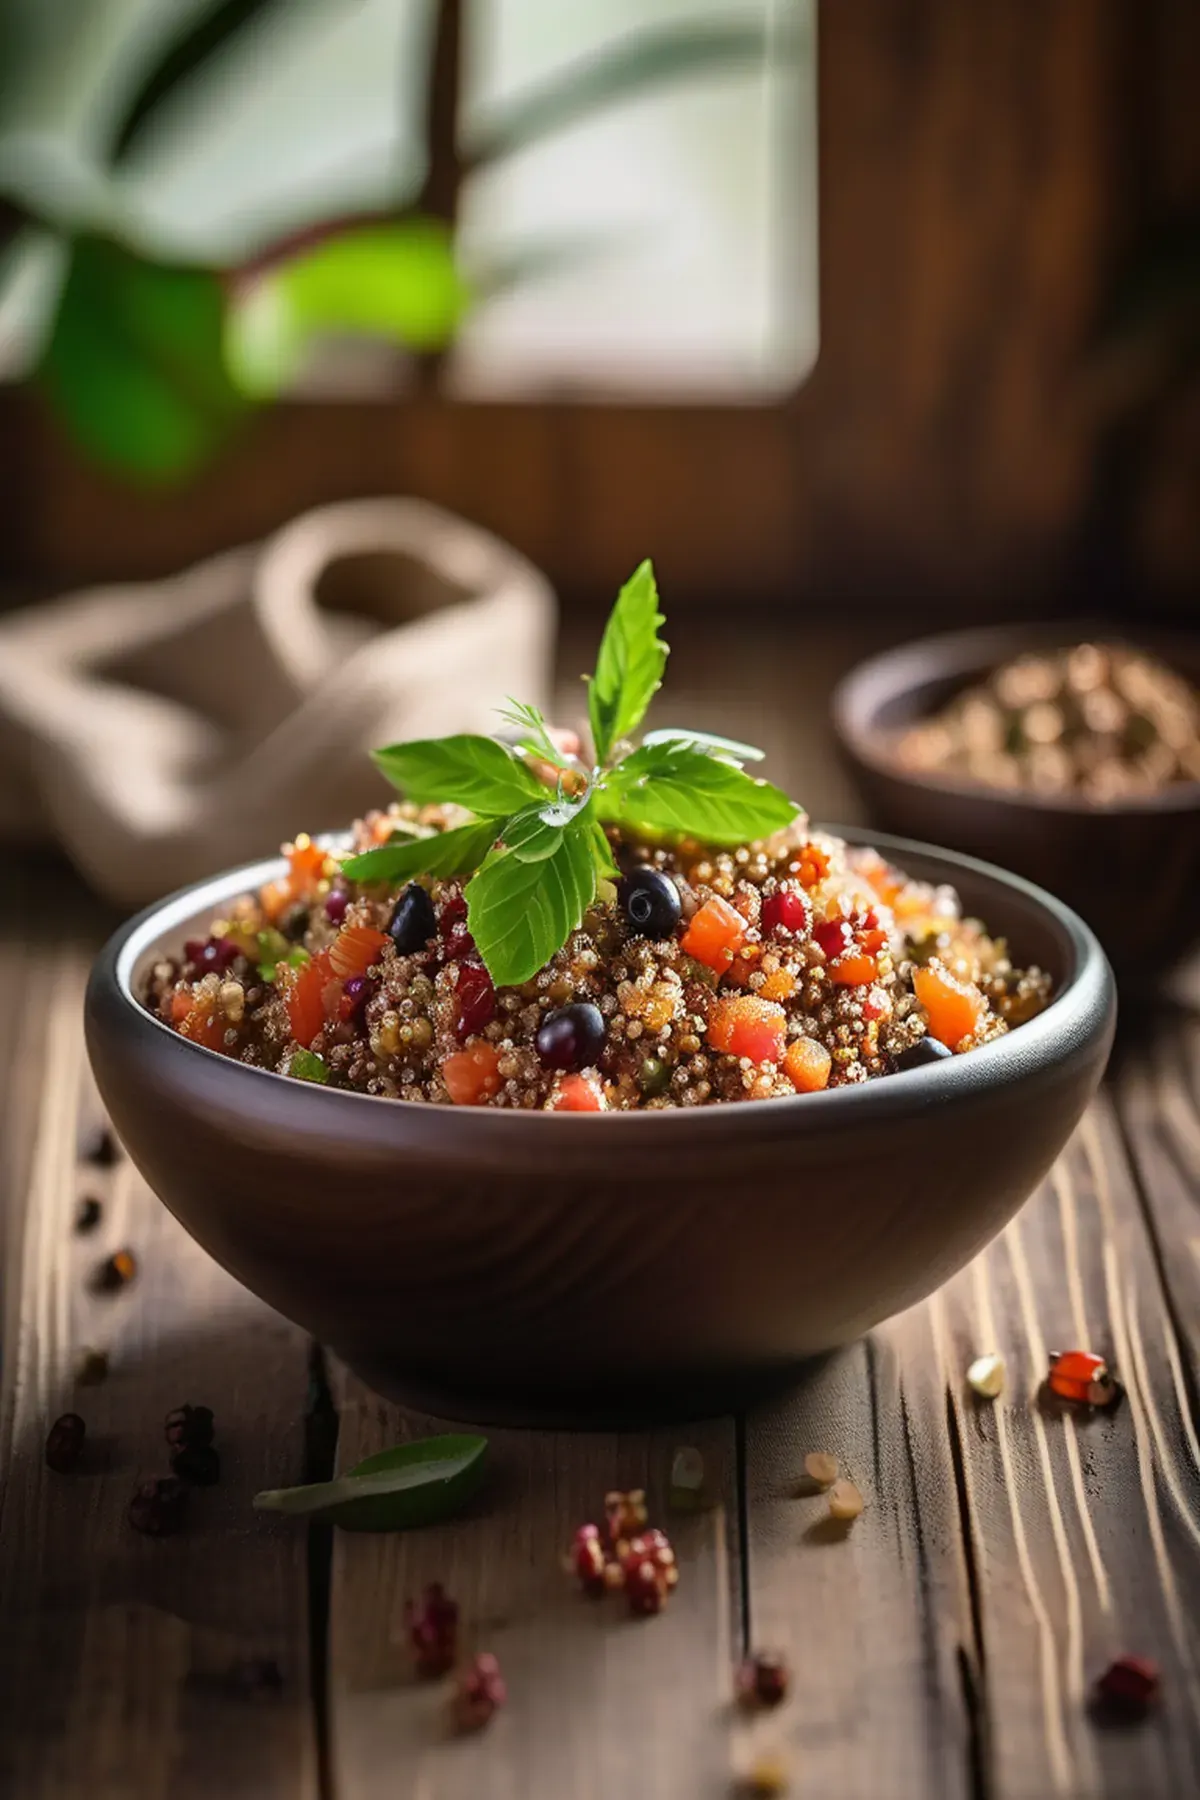
Tropical Quinoa
This tropical quinoa bowl has become my go to weeknight dinner because it comes together in just forty minutes and tastes like a mini vacation on a plate. Quinoa is one of my favorite ingredients since it's a complete protein with all nine essential amino acids, making it so satisfying and perfect for keeping energy levels steady. The combination of papaya, red bell pepper, and fresh cilantro brings vibrant flavors and colors, while the rice wine vinegar and orange zest add just the right brightness. Best part is the ingredient list is simple and affordable, yet feels fancy enough to impress anyone at your table.
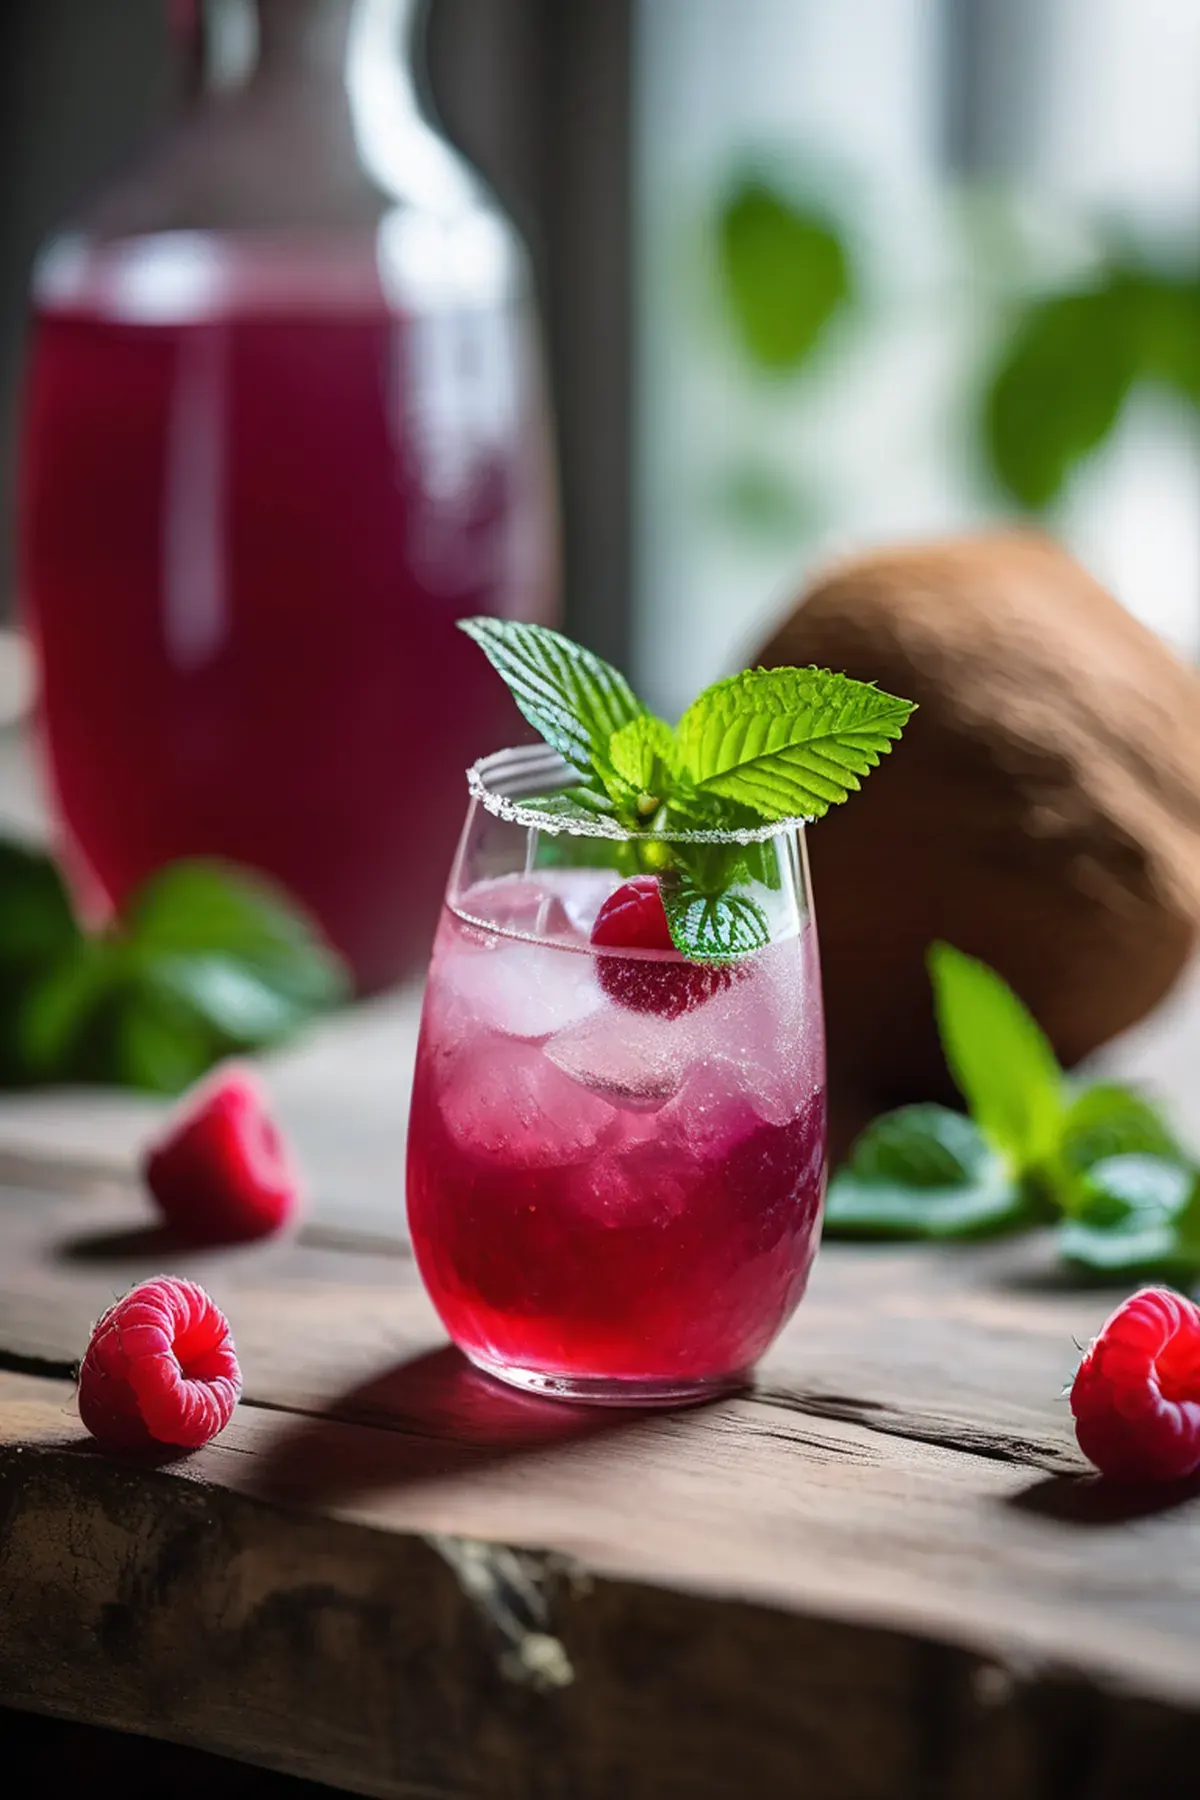
Coconut & raspberry crush
Have you tried making a drink that's both refreshing and genuinely good for you? This coconut and raspberry crush is my go to when I want something special without the fuss. The best part is how quick it comes together in just ten minutes of prep. Coconut water is absolutely fantastic for hydration, packed with natural electrolytes that your body actually needs. I love combining it with tart raspberries and a hint of mint for that perfect balance of sweet and zingy. It's simple, it's delicious, and honestly, it feels like you're treating yourself to something fancy.
Reviews
Sign in to write a review.