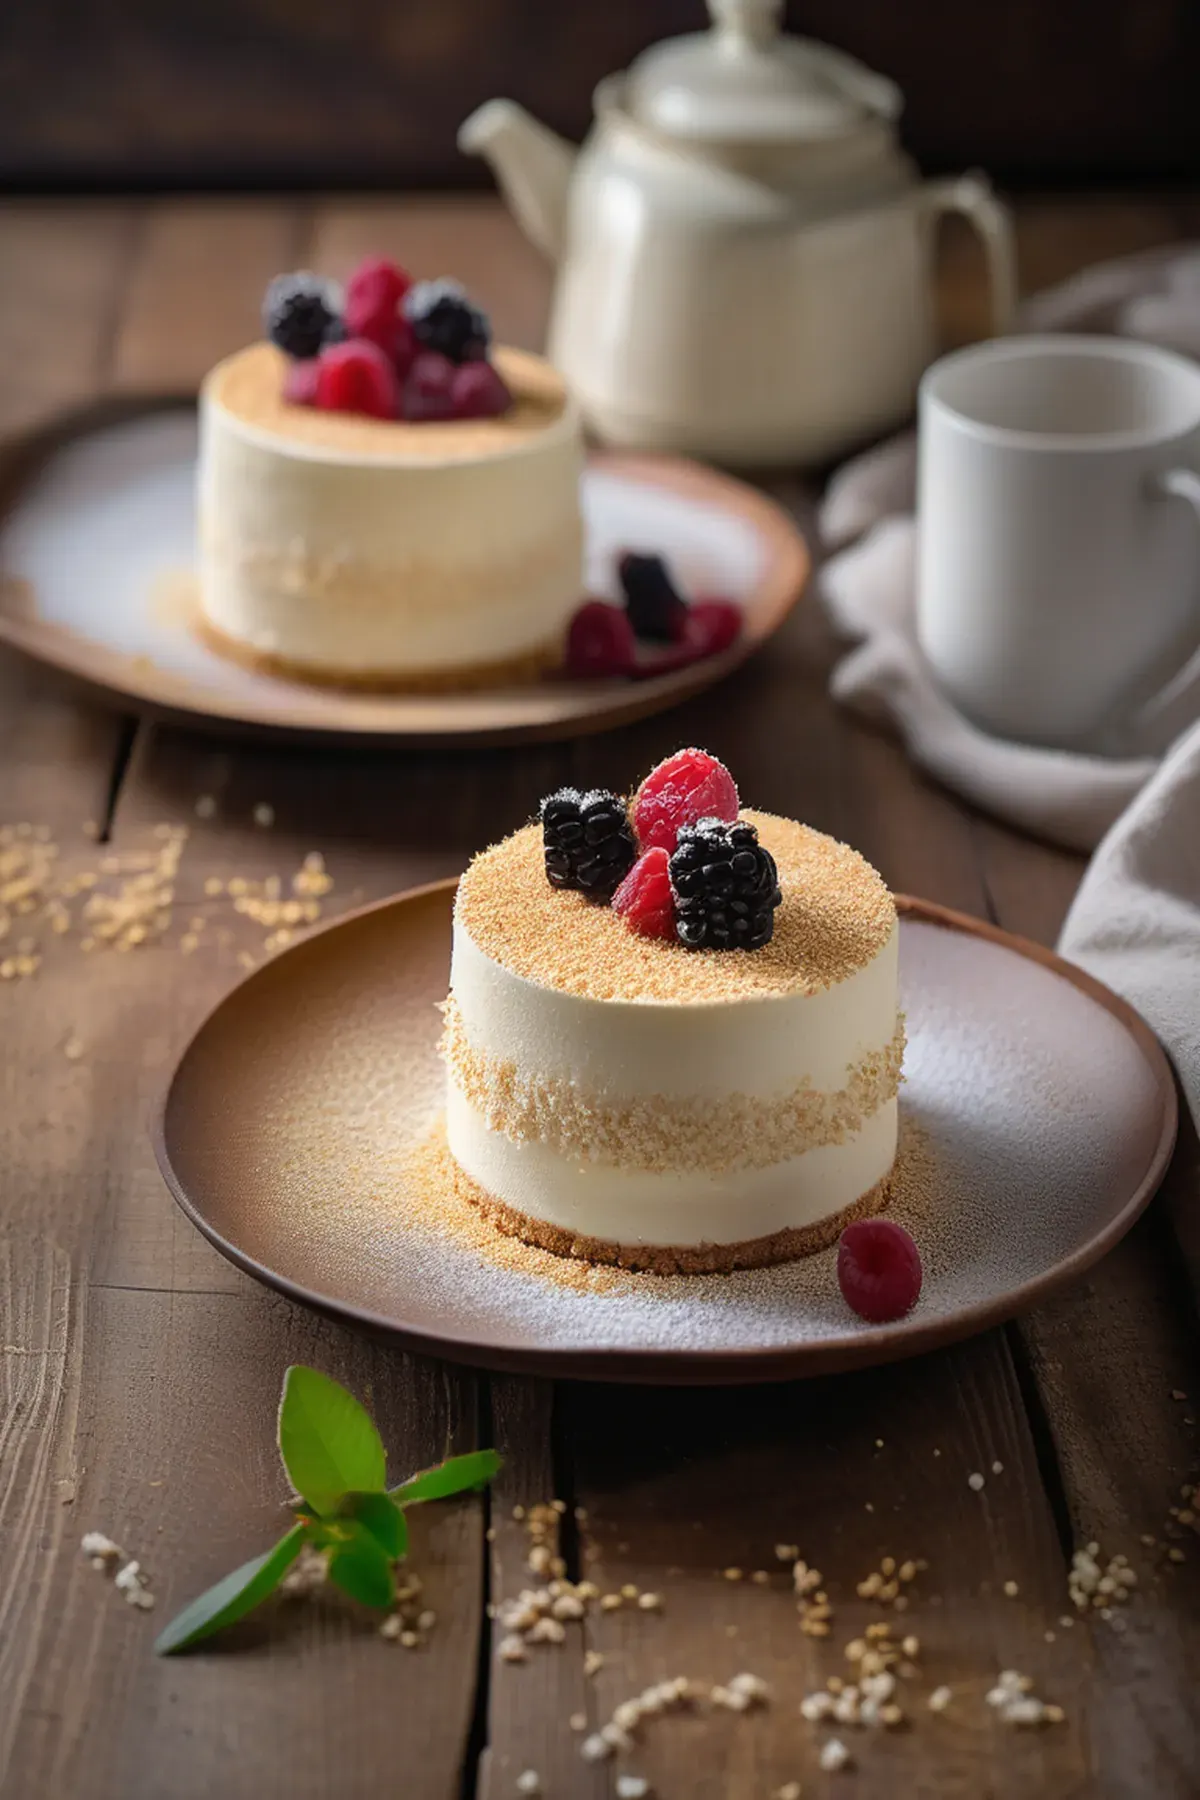
Vanilla Mousse Cake
Prep
20 mins
Cook
25 mins
Servings
6
Difficulty
Easy
This vanilla mousse cake is one of my favorite desserts to make when I want something elegant but not overly complicated. The beauty of this recipe is that it comes together in under an hour, making it perfect for weeknight entertaining or when you're craving something special without spending all day in the kitchen. Heavy cream, the star of our mousse layer, is rich in fat soluble vitamins that help your body absorb nutrients better. Plus, the ingredients are basic pantry staples, so you won't need to hunt down anything fancy or expensive. Trust me, this cake always impresses without the fuss.
Ella x
Ingredients
- 250 gall-purpose flour
- 200 ggranulated sugar
- 150 gunsalted butter, softened
- 3 egglarge eggs
- 1 mlvanilla extract
- 400 mlheavy cream
- 200 mlunsalted milk
- 5 gsalt
- 100 gconfectioners' sugar
- 50 gunsalted butter, melted
- 1 gvanilla bean paste
Detail level
Instructions
- 1
Preheat the oven to 180°C (350°F). Grease two 20cm (8 inch) round cake pans and line the bottoms with parchment paper.
Tip: Use a digital thermometer to ensure accurate temperature.
- 2
In a medium bowl, whisk together the flour, confectioners' sugar, and salt.
Tip: Make sure to sift the flour to remove any lumps.
- 3
In a large mixing bowl, beat the butter until creamy. Add the granulated sugar and beat until light and fluffy.
Tip: Use an electric mixer to speed up the process.
- 4
Beat in the eggs one at a time, allowing each egg to fully incorporate before adding the next. Beat in the vanilla extract.
Tip: Make sure to scrape down the sides of the bowl as needed.
- 5
In a separate bowl, whip the heavy cream until stiff peaks form. Set aside.
Tip: Don't over-whip the cream, or it will become too stiff.
- 6
In a separate bowl, whisk together the unsalted milk and vanilla bean paste.
Tip: Make sure to scrape down the sides of the bowl as needed.
- 7
Alternate adding the dry ingredients to the butter mixture, alternating with the milk mixture, beginning and ending with the dry ingredients.
Tip: Be careful not to overmix the batter.
- 8
Divide the batter evenly between the prepared pans and smooth the tops.
Tip: Use a spatula to remove any air bubbles.
- 9
Bake for 15-20 minutes, or until a toothpick inserted into the center of each cake comes out clean.
Tip: Don't open the oven door during the first 10 minutes of baking.
- 10
Allow the cakes to cool in the pans for 5 minutes, then transfer them to a wire rack to cool completely.
Tip: Use a clean towel to dust the cakes and prevent them from sticking.
- 11
Once the cakes are completely cool, whip the heavy cream again until stiff peaks form.
Tip: Add a pinch of salt to stabilize the cream.
- 12
To assemble the cake, place one cake layer on a serving plate and top with a dollop of whipped cream. Repeat with the second cake layer and top with the remaining whipped cream.
Tip: Use a spatula to create a smooth surface.
Recipe Variations
Get AI-powered ingredient substitution suggestions.
You Might Also Like
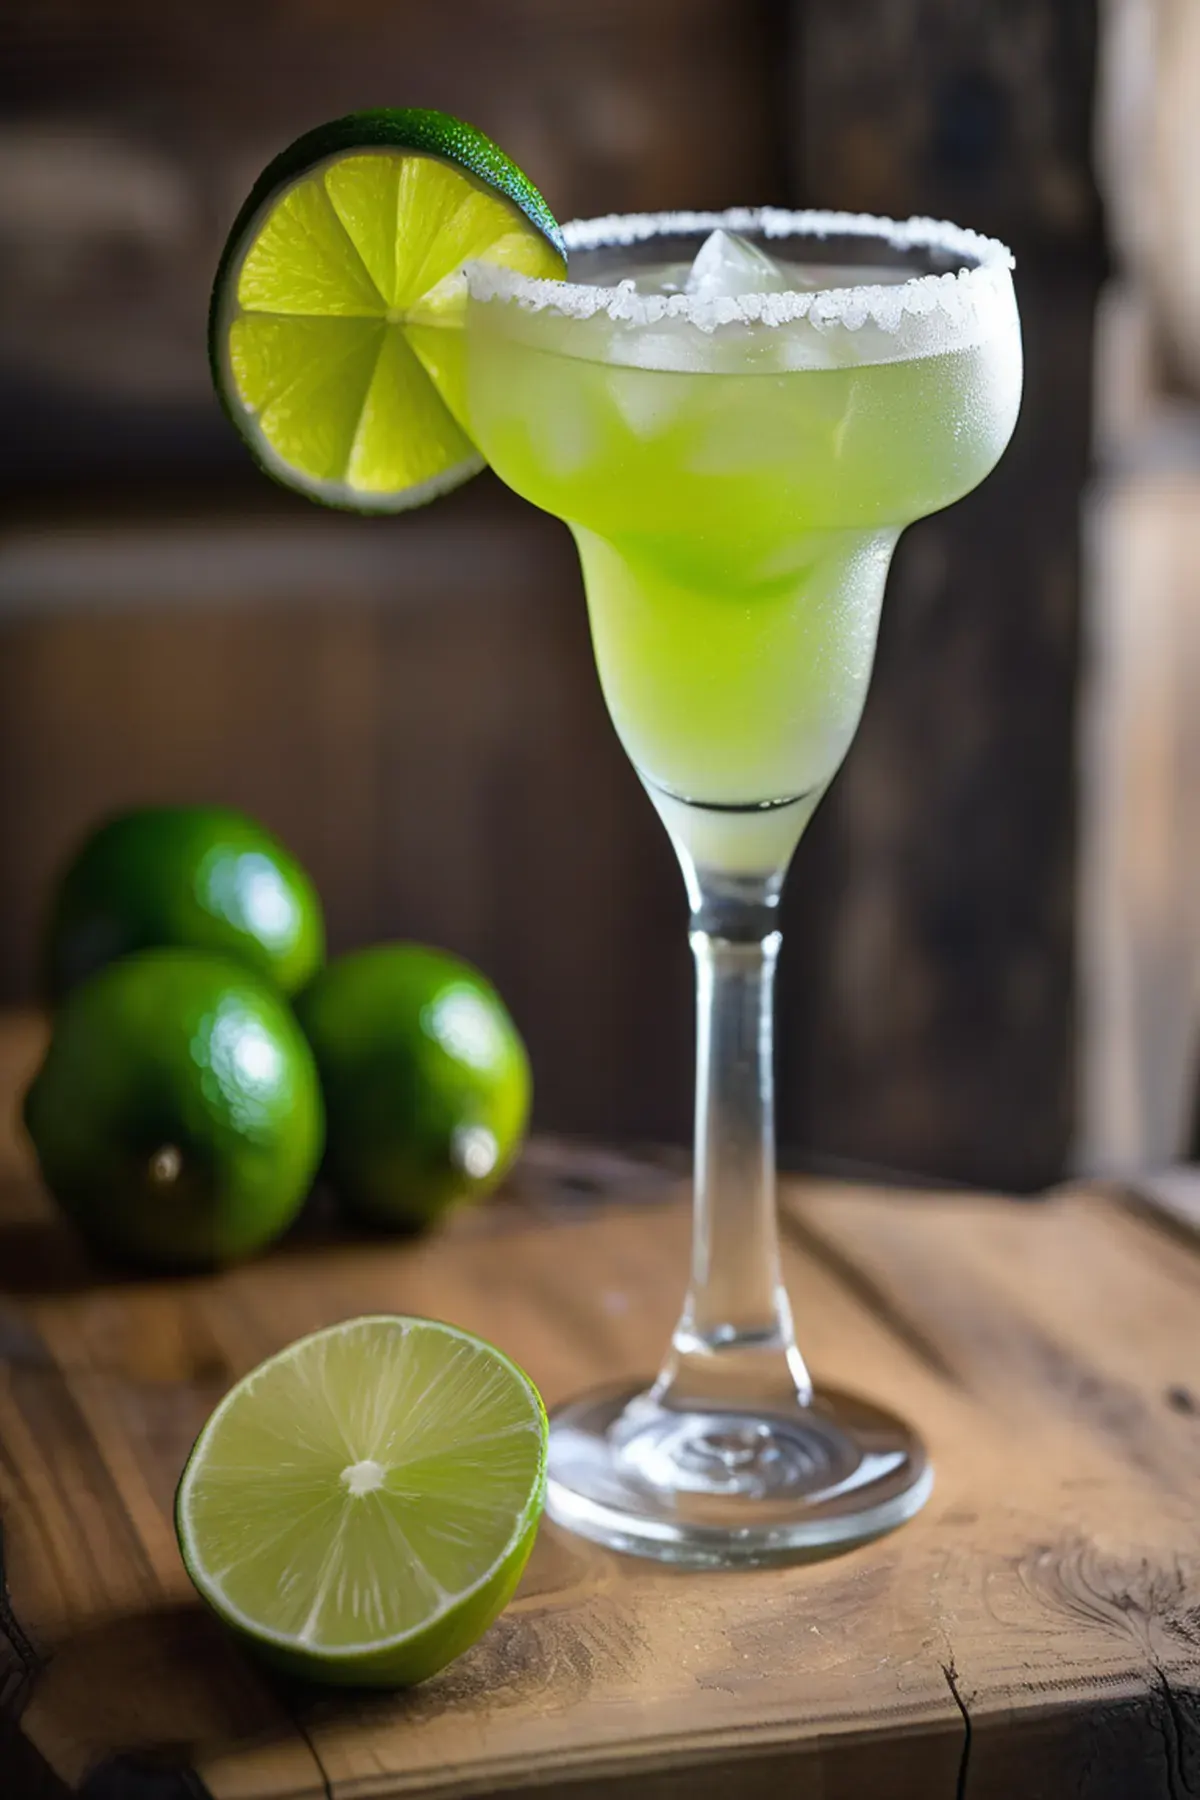
Beergarita
My go to drink for summer gatherings is this refreshing Beergarita, and let me tell you, it's a total crowd pleaser. The combination of tequila, triple sec, fresh lime juice, and a cold Corona creates something that tastes way more complicated than it actually is. Lime juice is packed with vitamin C, which is great for your immune system, and the whole thing takes just five minutes to throw together. Best part? It's incredibly budget friendly since you're probably already stocking most of these ingredients anyway.
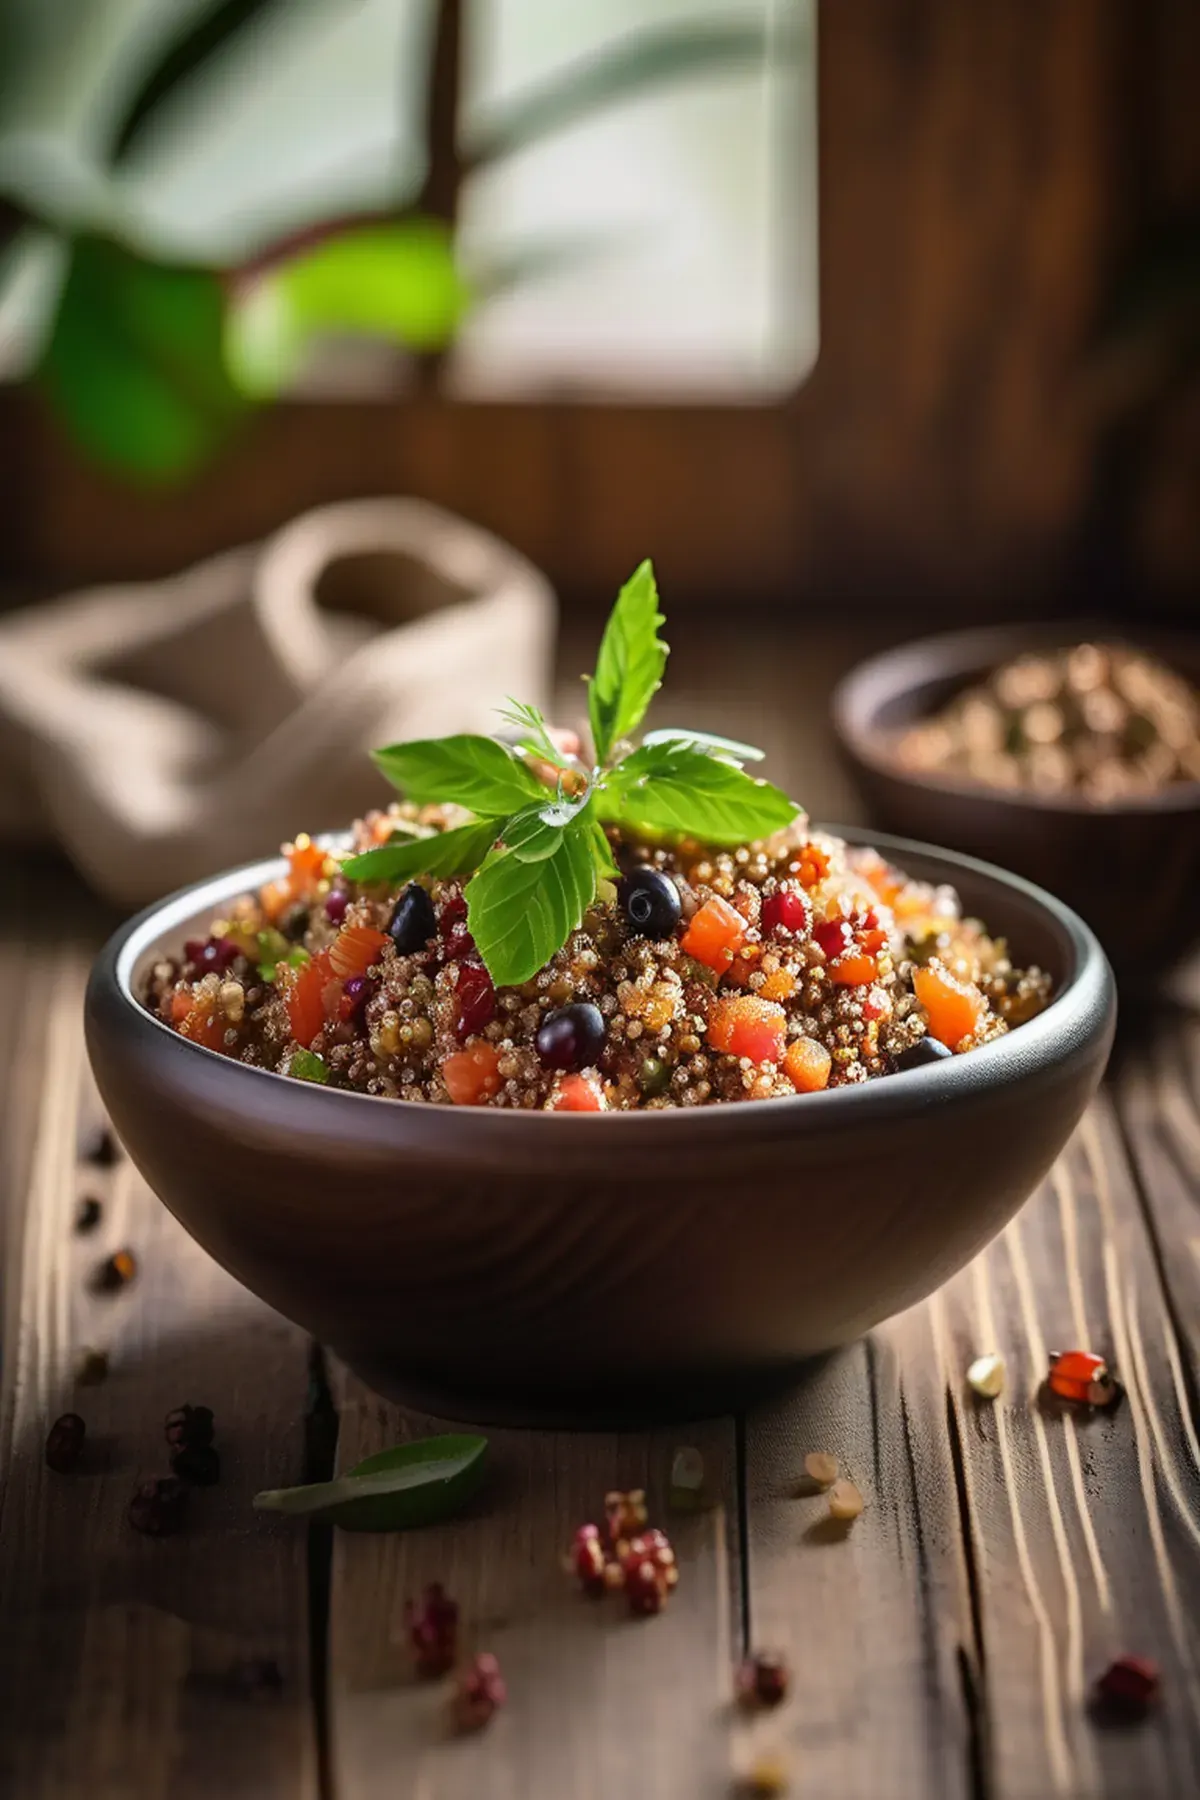
Tropical Quinoa
This tropical quinoa bowl has become my go to weeknight dinner because it comes together in just forty minutes and tastes like a mini vacation on a plate. Quinoa is one of my favorite ingredients since it's a complete protein with all nine essential amino acids, making it so satisfying and perfect for keeping energy levels steady. The combination of papaya, red bell pepper, and fresh cilantro brings vibrant flavors and colors, while the rice wine vinegar and orange zest add just the right brightness. Best part is the ingredient list is simple and affordable, yet feels fancy enough to impress anyone at your table.
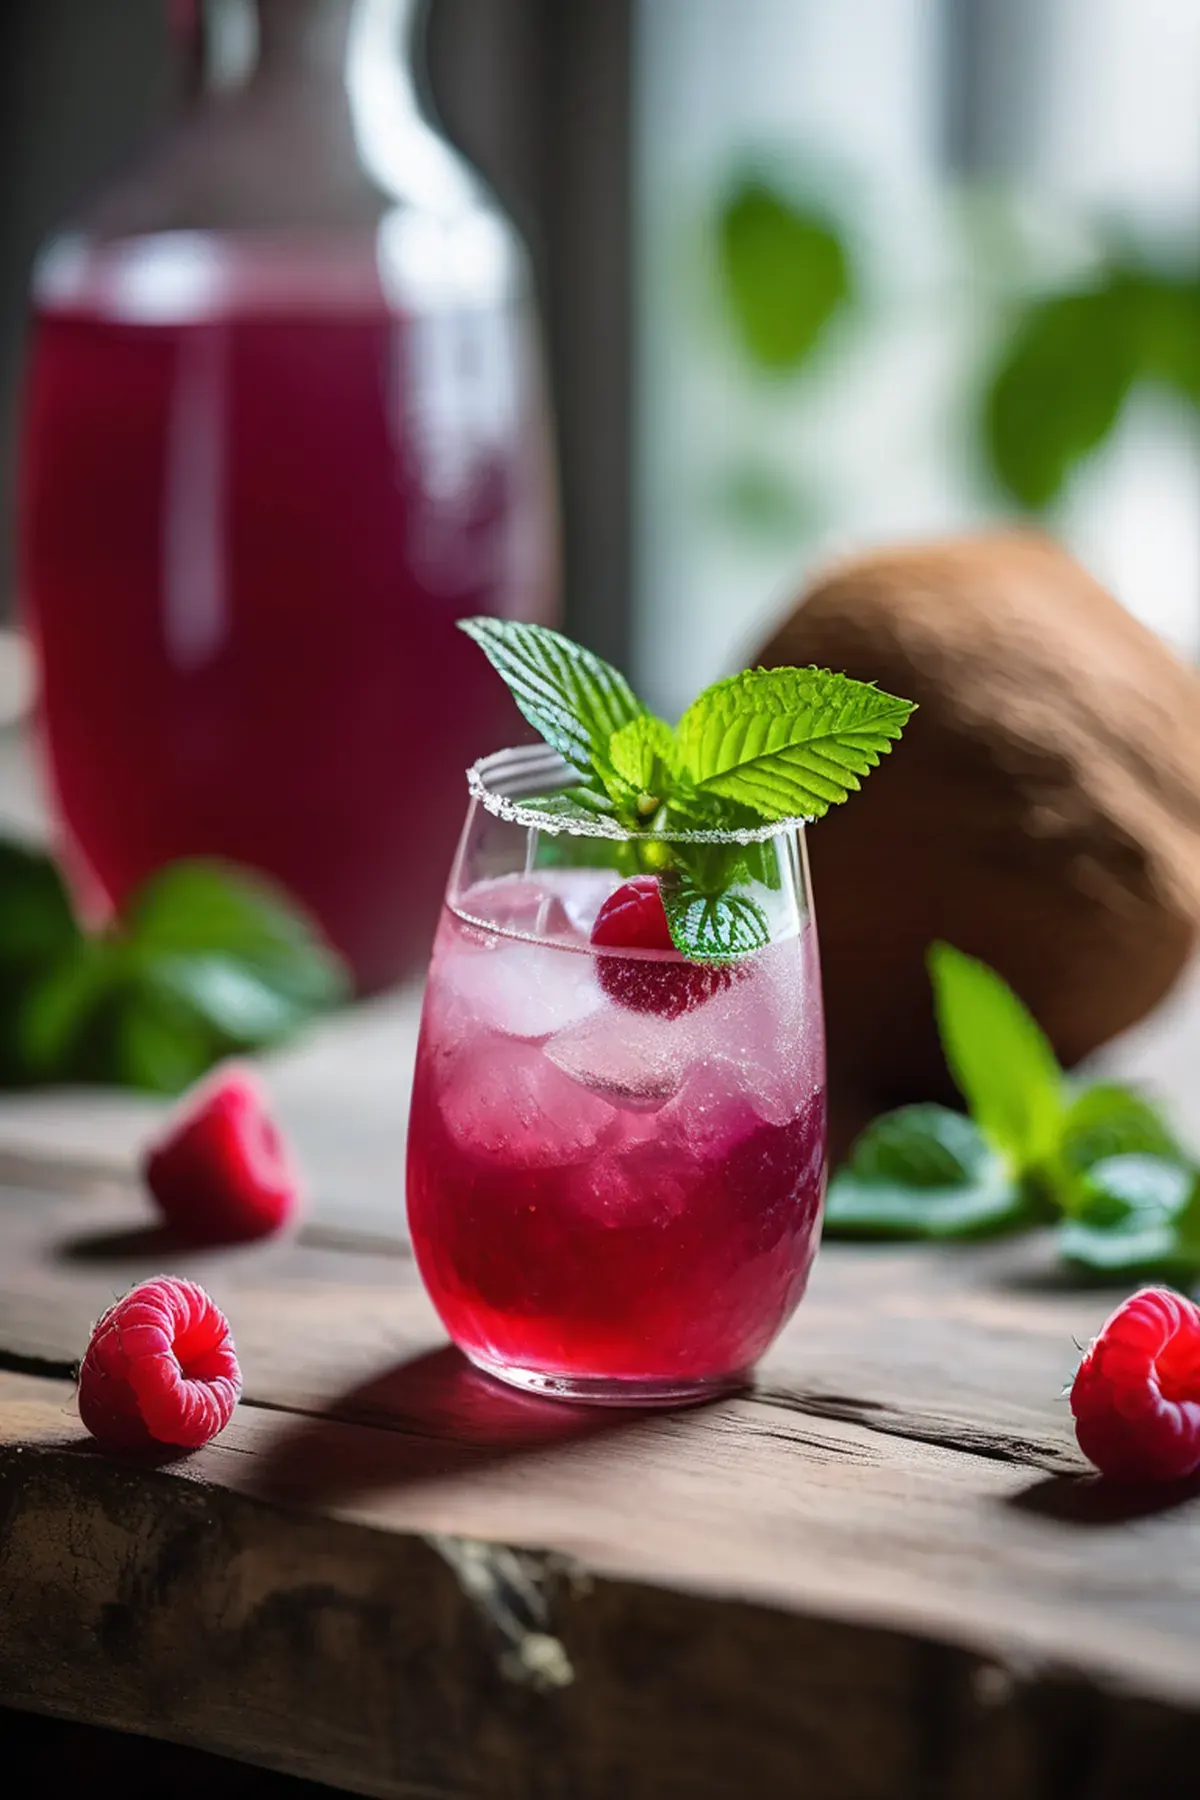
Coconut & raspberry crush
Have you tried making a drink that's both refreshing and genuinely good for you? This coconut and raspberry crush is my go to when I want something special without the fuss. The best part is how quick it comes together in just ten minutes of prep. Coconut water is absolutely fantastic for hydration, packed with natural electrolytes that your body actually needs. I love combining it with tart raspberries and a hint of mint for that perfect balance of sweet and zingy. It's simple, it's delicious, and honestly, it feels like you're treating yourself to something fancy.
Reviews
Sign in to write a review.